
Garden and Swimming Pool Project
The Whole Story, in Pictures - Lots of Pictures!.........Scroll to bottom for end result.
Please note that we have since moved (2013), so this is now a reminder for us.
Started May 2001 - Sort of Finished June 2004
Latest pictures added July 2008 - shows how the plants and shrubs are maturing - scroll right down to see these lates images.
Total cost - about £15,000 (not counting the blood sweat and tears!)
I kept being asked by friends and relations around the country how the project was going - this way everyone could keep up and get pictures as well.
May 2001 - We had a relatively large back garden (45m x 15m). It was mostly grass. Many people were horrified at the idea of me digging the whole thing up, but they didn't have to live with it. The ground sloped in two directions and in the foreground in the picture below it kept moving and sinking - we found out why later. The grass needed watering constantly so it wouldn't die on the very poor "soil" beneath, it was a pain to mow (given the slope and undulations) and it wasn't even proper lawn, just field grass.
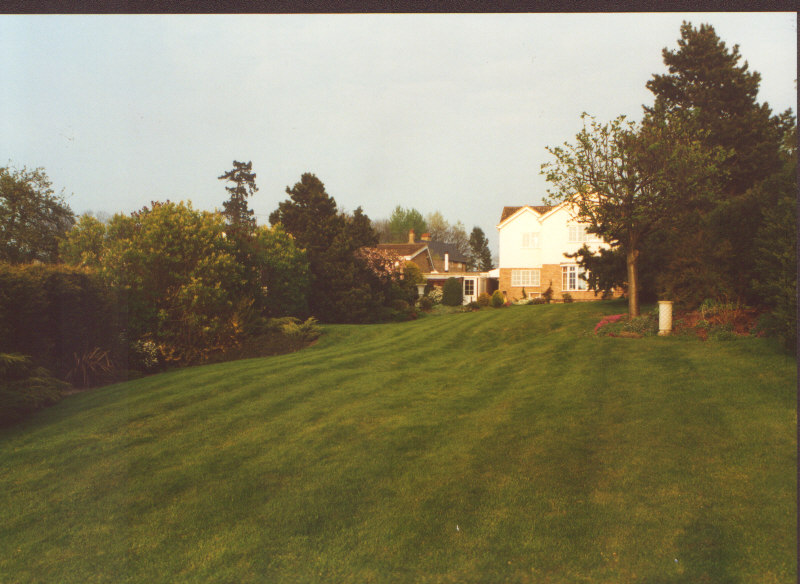
Click to enlarge (this is an older "pre-conservatory" picture)
We could only consider this major project if we could get access from the field. The farmer said yes and part of the old wall was taken down to allow various types of vehicle in from the field.

Click to enlarge
June 2001 - Just like on Groundforce I hired a turf cutter and nearly broke my back using it for a couple of days - it wasn't as easy as shown on TV - trust me! Of course I then had to lift the turf. Below you can see the cut - but not lifted turf.

Click to enlarge
As you can see, I piled the turf into a mound - the idea was for the turf to rot down into some decent topsoil for a new lawn - one on soil rather than rubble and rubbish.

Click to enlarge
July 2001 - I then began to rearrange the ground, turning a slope into two levels with a height difference of well over two metres. I used the farmer's JCB - if he hadn't owned one I'd have had to buy one.
Below you can see the mess I made! The higher level would become a new lawn. In the foreground is a glimpse of the lower swimming pool level.
Click to enlarge
August 2001 - The lower level presented some awkward problems. Being in the grounds of the old hall the lawn didn't cover virgin soil, but a dumping ground for rubble and the odd tree stump (and trunk!) - an ominous sign of things to come. This rotting shifting wood was causing the shifting and subsidence of the lawn - and was probably causing the numerous fungus rings as well.

Click to enlarge
Below you can see the rough area in mind marked out in blue rope.
As you can see, it was still early days!

Click to enlarge
Over the Winter it was too wet (the ground that is) to do much of anything. All I managed to do was build some retaining walls around the pool area. As the ground wasn't that good I made sure everything was built on and backed up with reinforced concrete.
February 2002 - I thought I'd get a quote to get someone else to dig the hole and build the walls. Time was marching on, the ground was still too wet for field access and we wanted to swim in the pool this decade. What's more I needed a proper excavator to be able to swing right round to unload - JCB's have a huge "footprint" and I couldn't do any more digging with one in what would become a very confined space.
March 2002 - Anyway, I tried a local pool company, and discovered that this option was a non starter (just a little too expensive - well actually hugely too expensive - helped remind me why I was doing it myself).
April 2002 - In the meantime I started the path snaking down to the "hidden" pool area. It was at this stage that I decided the home made black plastic lights just weren't good enough. I would make some new homemade ones using stainless steel when I got time.

Click to enlarge
Now that the evenings were getting longer things started to happen again.
May 2002 - Having abandoned getting a pool company in I arranged to hire a 360o excavator. It'd need to be big too. Then a stroke of luck - I found a local company with keen hire prices and a special deal which meant a getting a skilled operator for not much more than the cost of the excavator. So we hired them.
The farmer was on hand with his tractor and trailer. The laser line generator was turned on and the rain was just starting. The director of digging (me) raised his hand and the fun began!

Click to enlarge
Now in the "Build Your Own Swimming Pool" video there was no mention of this. Yet more huge great tree stumps and pockets of liquid mud and rotten wood. One side of the pool just slumped into the hole......

Click to enlarge
...and the result was worrying. Apart from needing several cubic metres of decent backfill, the path foundations were now hanging in mid air and in danger of twisting the whole retaining wall out of line. On the left, the ground was fine!

Click to enlarge
In case you are wondering what happened to all that spoil? Well one of the hollows in the field isn't quite so hollow any more!

Click to enlarge
Still in May 2002 - The bottom of the pool excavation was blue clay, and some serious drainage needed sorting as there are several old land drains feeding into the pool area. The pool began to fill with muddy water - quickly!
The solution? Borrowed the JCB again and created a 10ft deep (at the pool end) trench, complete with land drainage pipes and gravel. This would include an inspection/junction chamber (25 metres away) and then eventually some 50 metres of further pipe to intersect a large disused old 9" clay drain from the old hall. Why is nothing ever simple?!


Click to enlarge
June 2002 - Progress at last. Despite more wet weather I managed to complete the drainage. Pipes and gravel from the bottom, sides and backflush water would all feed into the "manhole" (foreground) and run off down the hill for 50m in a 1m deep trench to a disused drain from the old hall.


Click to enlarge
I built some pillars to hold up the existing concrete foundations, set beside a shingle drainage channel beneath the foundations ('cos I've got running water!) and used an old coal bunker as some temporary shuttering. I also dug out the remains of the footings.


Click to enlarge
I found a young lad and his mates to build the pool walls (I was short of time and the thought of laying over 600 high density concrete blocks didn't appeal any more - been there, done that - though not quite so many). I just did the fiddly bits round the various fittings and acted as site manager as I got on with some of the other jobs.
July 2002 - The picture below shows quite a lot of what was going on. The foundations were now in and the walls were going up.

Click to enlarge
Top of picture: The lawn edging is installed (getting a nice smooth curve with the thin stainless steel was quite a challenge). Middle of picture: The water feature actually appears to work as I envisaged - quite a bonus.
Next up was a load of groundcover matting. This would keep the weeds at bay and be held in place by quite a lot of granite.

Click to enlarge
August 2002 - 18 tons of granite makes one humungus pile! (unfortunately I forgot to photo it). It took four solid days of shovelling and barrowing to get it onto the garden where it belonged. What is worse, I knew I would need as much again before the job would be done - ouch.
Here you can see the pool walls up to full height and granite in place (with ground cover matting beneath). The water feature was now now finished - so I've included a nice "evening sun" view of it. It all looks a bit stark at the moment, but as the greenery gets established it will soften dramatically. The granite is hard wearing and angular - which meant it would hold on the steep slope - the critical factor.


Click to enlarge
September 2002 - I now went back into the pool itself to sort out the drainage etc.
I needed to allow water to flow under and out from the excavation along the deep drain I had dug earlier. The picture shows the spring and land drain channels which join to flow towards the top of the picture. You can also see the bottom drain going in. The extra thick footings and overdig was necessary to get to undisturbed ground (just goes to show how deep the infill was!).
Covering all this (once dug out by hand to undisturbed subsoil) would be up to 12" of lean mix (porous) concrete.

Click to enlarge
October 2002 - In the picture below you can see that things had moved on to the point that the hole was now a swimming pool in waiting.
In the picture below the concrete sub-base is in place (and with much relief I discovered that it did indeed let the rain soak away). This could now be left until rendering in late Spring. You can also see that the retaining wall is finished (the white is the protective film covering the brushed stainless steel panels) and also in the picture is one of the lights I made/modified. And oh yes, I had the next 18 tonnes of granite delivered.

Click to enlarge
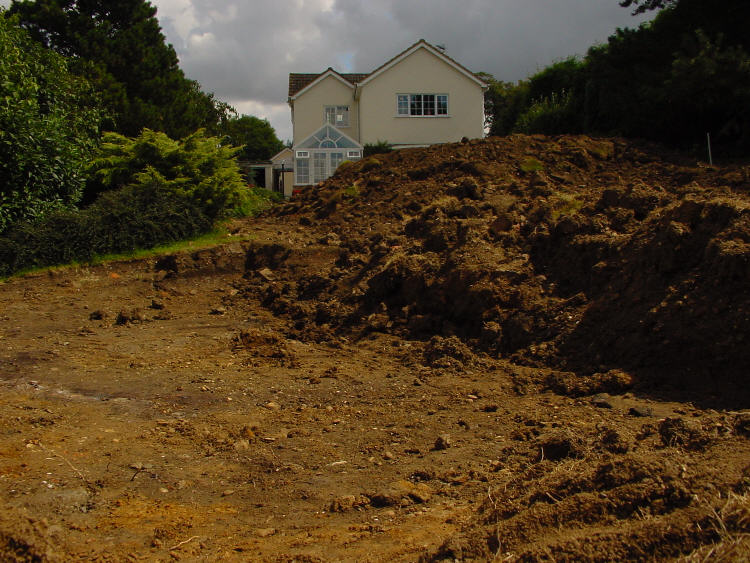
I also turned my attention to the new lawn area nearer the house. The turf from 15 months ago hadn't really rotted down at all, so I needed to wait yet longer before I could lay the new posh seeded turf.

Click to enlarge
The ground was now well and truly waterlogged. The amount of rain we had really put my earthworks, foundations and drainage to the test.
April - 2003 - It's been dry again so back to work.
Job number one was to put in the pool pipework. As most of it would end up being buried under reinforced concrete I've tried to allow for all eventualities. I've put in an automatic level control, which seals and drains down in the Winter. I've also connected a winter drain to the skimmer, so it should stay water (and ice) free. Here are the pictures, but pipework isn't that exciting.
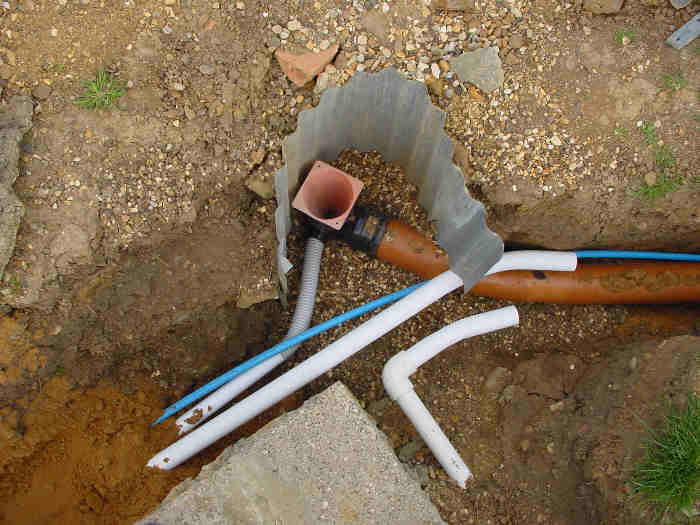


Click to enlarge
Trying to be too clever? Well just in case I added a stainless steel lintel over the skimmer - 1" of mortar between a wide plastic framed hole and the copings just didn't seem enough to me. I've also put in a Winter pool overflow. The pictures below show part of the drainage system which just happens to run over the pool return pipes. The screw cap comes off in Winter and is replaced by a small stand pipe which acts as an overflow so that the pool can't fill up to the skimmer when it rains.


Click to enlarge
May 2003 - Below you can see, or rather the idea is that you can't see one of the swingbed supports in place. They're slightly over-engineered. 100mm x 100mm and 10mm wall thickness, set in an awful lot of concrete! The stainless tubes are sleeves over 50mm solid steel bar. It ain't going nowhere - at least after I added reinforced concrete feet to the uprights! The conifer should soon grow back to hide the uprights (and it did).. The swingbed itself was planned to go up once the patio was finished. Speaking of the patio, the picture shows the patio foundation going in. As you can see, again I took no chances about it cracking or moving.


Click to enlarge
Below you can see where the pump, filter and heating would go - there would be a mini building here. The return pipe to the pool is missing as it comes from under the conifer and would be attached when the heating pipework was in place.

Click to enlarge
Turf time! In the first picture you can see the prepared topsoil (12 tonnes of blended "root zone" from a commercial supplier). This took two days to trailer, barrow and level. The white stuff is fertiliser.
Click to enlarge
And so to the turf.
This was meant to be Rolawn Medallion. It was meant to be dark green, dense and yes - alive. The picture shows how awful it looked. I laid this much as I kept getting "professional" assurances that a good water would sort it. Well it had a good water and after 24 hrs it looked like this.

Click to enlarge
The last straw was the turf I finished off with (now being short from having to take so much back as being even worse!). This new turf was how it should be.

Click to enlarge
So, I took up the whole lot and "persuaded" Rolawn to deliver a new batch the same day. Below is what this looked like after a couple of weeks. Not bad if I say so myself!

Click to enlarge
June 2003 - Meanwhile the pool was about to be rendered. In the first picture you can see the battening and in the second the scratch coat applied.


Click to enlarge
I used professional plasterers for the walls, but did the floor myself. The proof is clearly visible below! This job was slow, hot and awkward - and I don't want to do it again! One problem was the conflicting instructions I was getting from different pool companies about the finish, radius'd edges, etc.

Click to enlarge
July 2003 - And at last, the pool structure was about done. We measured the pool, ordered the liner and went on holiday to France for a week.

Click to enlarge
Fitting the Liner - we wanted a warm sunny day and we got just that. In fact, it was too hot. One side of the pool was in sun and the other in shade. This meant that the liner was very hard to position correctly as the side in the very hot sun simply stretched like pizza dough whenever we tried to move it. Here is the liner before and after turning on the vacuum cleaner.


Click to enlarge
At last - water in the swimming pool!

Click to enlarge
The pool filled in 24 hours, had no cover as yet and no heating - yet the weather was so hot we were in there - up to 23 degrees in just two days!
August 2003 - The oil boiler has been checked and signed off by "Mr OFTEC" - so now we have heating!
Armed with an inflatable armchair present from some good friends of ours, a hot sunny day and warm (27o C) water I was at last able to properly test the water - and it was good!
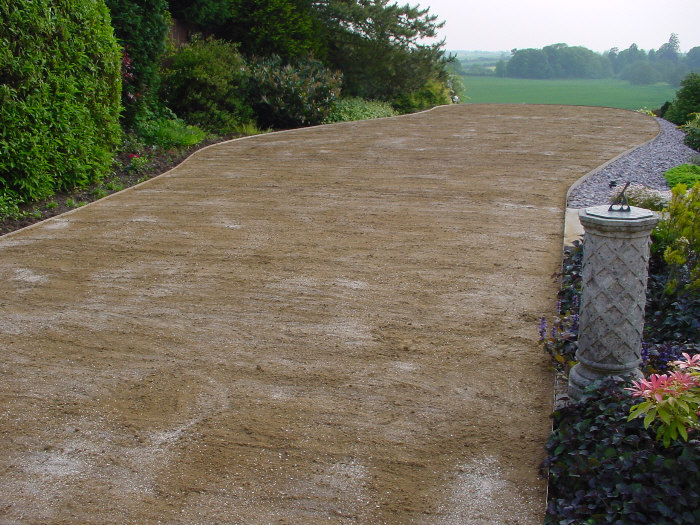
September 2003 - We had our last swim on the 22nd and I've started to lay the 200 slabs. I took professional advice about how best to do this.....
Winter 2003/4 - Disaster strikes. The terrible ground conditions which had meant a much more massive construction than usual had another surprise in store for us . A side effect of thick concrete is that water which gets beneath the liner is slower to drain away - but drain away it did. What I didn't count on was water draining in through the shallow end wall (from some of the springs) faster than it could drain out. Water got behind the liner which lifted up big time. It was distorted and had to be scrapped. AARRGGH!
Then disaster number two - the professional advice about laying the slabs was wrong and the frost got beneath them into what was too weak a mix and most began to rock when walked on. AARRGGH! There are no pictures of these bits as I wasn't in a photographic mood!
February/March 2004 - Job 1 - The liner is removed and scrapped ready to install a drainage channel (more later). All 200 slabs were lifted, the weak mortar bedding dug up (took ages) and the whole lot re-laid on a strong solid mortar bed by yours truly. Again, no photos - the sky wasn't blue - but the air was....
April 2004 - Time to tackle the glass screen. The idea was to screen out the prevailing wind, but keep the view.
We get some pretty strong winds, so the steel used is all thick walled, galvanised and set into foundations suitable for a skyscraper! I've included a boring picture of the foundations at one end to show I'm not kidding - 2 feet square with long "toes" by each post. This ain't going nowhere!

Click to enlarge
May 2004 - This is when I cut in the special under-liner drain. The picture isn't clear, but there are small holes just under the skimmer rim, at the bottom of the wall and between the slope and the floor. The channel is then piped down into the underground drainage put in ages ago. I can put a 6" of water in the pool shell and in fifteen minutes it's gone - faster than any water could ever soak in (I hope!).

Click to enlarge
June 2004 - The new liner was installed - much quicker job as this was my second one in two years!
The stainless cladding is fitted to the steel uprights for the screen, the DIY roller is assembled, we fitted the 10mm toughened glass panels (thanks Technical Glass for giving me such a good deal and thanks to Geof and Alex for helping me with some VERY heavy carrying!) and the pictures below show the end result AT LAST.
In the picture below you can see the year-old lawn and the glass screen supports down the garden - but the glass is virtually invisible

Click to enlarge
Below you can see the finished swing bed in all its glory. Sarah is making some cushions (aren't you Sarah...).

Click to enlarge
Below you can see the "laid, dug up, re-laid" slabs, the pool, the screen and why it was worth persevering!

Click to enlarge
Below you can see the glass screen structure, my pivoting DIY roller mechanism and oh yes, that lump of stone, bottom right corner, is part of a grave stone for a famous race horse which won the Cheltenham Gold cup in the 20's or 30's. We didn't find any bones during the excavation, but he's buried here somewhere.

Click to enlarge

Click to enlarge
The rest should just speak for themselves - updated July 2008. Click on any picture to enlarge......
 ..........
 ..........
 ..........
 ..........
 ..........
 ..........
 ..........
 ..........
 ..........
 ..........
Summer 2010 - Behind the swing
bed, the conifer hedge was hit by those dreaded brown patches so common
recently.
The closely cropped hedge quickly became a real eyesore and a major problem.
The steel supports for the swing bed were never designed to be pretty
and a wooden fence would look just plain wrong in this setting.
In October I cut the hedge down (four large conifers) and they became
part of the village November 5th bonfire.
In April 2011, I built my solution to the gaping hole that was left.
As always, trust me, it is over engineered.....
y the dreaded brown patches.
 Click
image to enlarge
Click
image to enlarge
 Click
image to enlarge
Click
image to enlarge